Besides the in-game settings, the NVIDIA Control Settings are probably the best way to improve the performance of your system without a hardware upgrade.
For me, it’s always about maximum performance, and I also accept quality losses as long as it doesn’t negatively affect my personal performance.
To that end, it’s important to note that these settings are the best for my system and therefore don’t automatically work equally well for everyone because you always have to consider the settings in combination with your monitor’s settings and, of course, the in-game settings of your favorite game.
I use a BenQ XL2546 with 240Hz. It is a monitor used by many current pro gamers, as we could determine in our analysis in this article.
If you also have a BenQ XL2546 or want to get one, then maybe my Monitor Settings will help you, especially in combination with the following NVIDIA Control Settings.
The following should work fine as a starting point to find your best settings. Any settings I don’t list here should remain at the default value.
Let’s go!
Note: This article was written in English. Translations into other languages may not provide the same linguistic quality. We apologize for grammatical and semantic errors.
3D Settings
Adjust image settings with preview
Use the advanced 3D image settings
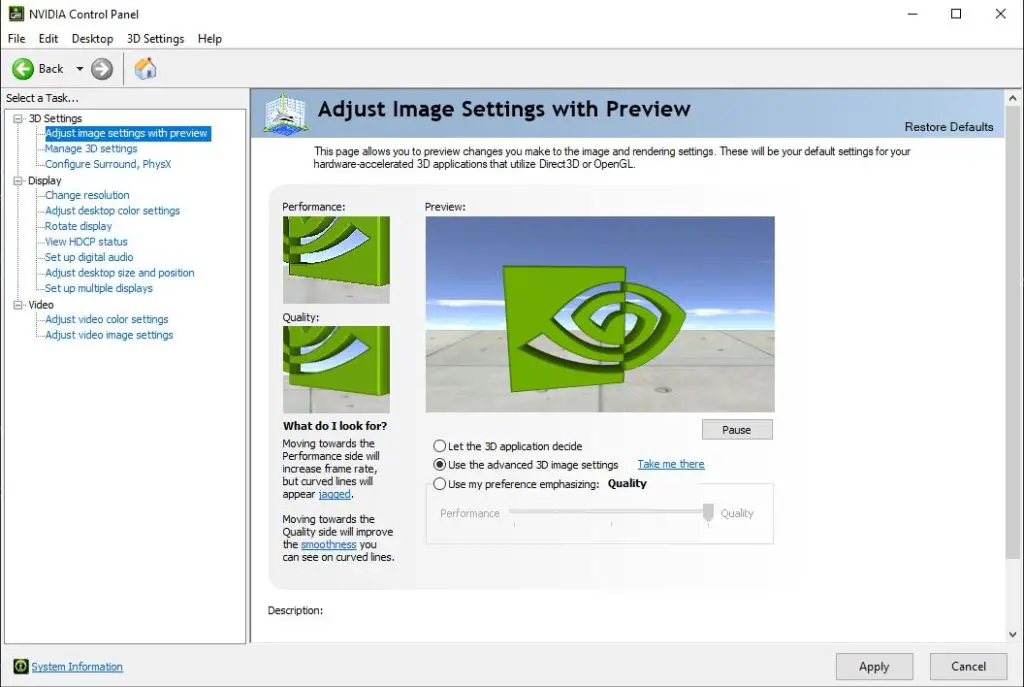
Important explanation
This setting is important so that the changes under “Manage 3D settings” are considered.
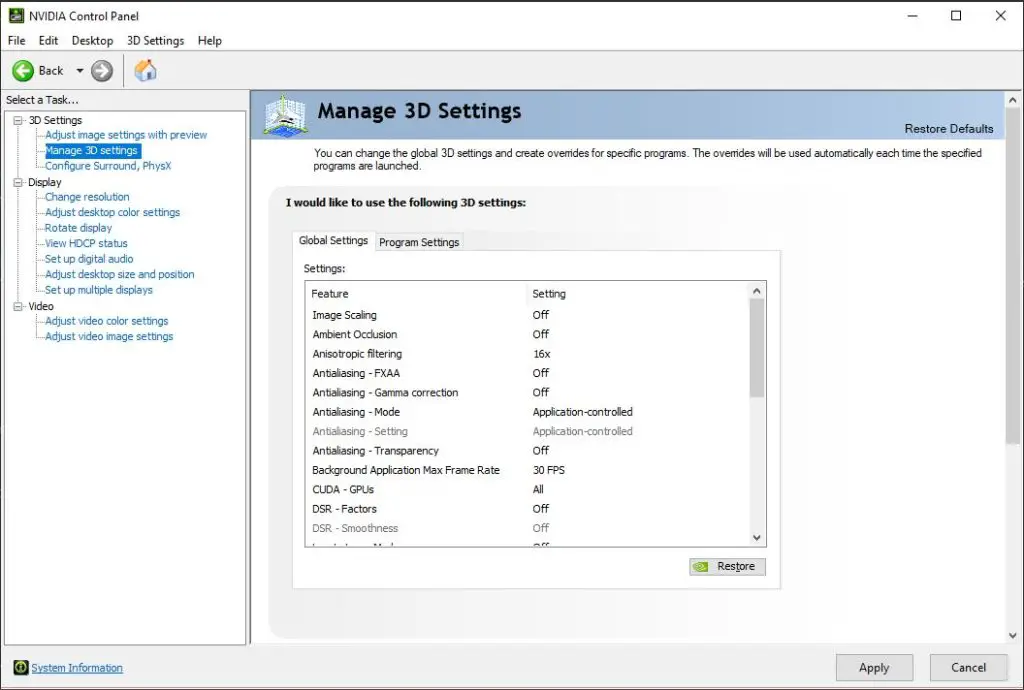
Manage 3D Settings
Global Settings:
| Image Scaling | Off |
| Ambient Occlusion | Off |
| Anisotropic filtering | 16x |
| Antialiasing – FXAA | Off |
| Antialiasing – Gamma correction | Off |
| Antialiasing – Mode | Application-controlled |
| Antialiasing – Setting | Application-controlled |
| Antialiasing – Transparency | Off |
| Background Application Max Frame Rate | 30 FPS |
| CUDA – GPUs | All |
| DSR – Factors | Off |
| DSR – Smoothness | Off |
| Low Latency Mode | Off |
| Max Frame Rate | Off |
| Multi-Frame Sampled AA (MFAA) | On |
| OpenGL rendering GPU | Auto-select |
| Power Management mode | Adaptive |
| Preferred refresh rate | Highest available |
| Shader Cache Size | 5 GB |
| Texture filtering – Anisotropic sample optimization | On |
| Texture filtering – Negative LOD bias | Clamp |
| Texture filtering – Quality | Performance |
| Texture filtering – Trilinear optimization | On |
| Threaded optimization | Auto |
| Triple buffering | Off |
| Vertical sync | Use the 3D application setting |
| Virtual Reality pre-rendered frames | 1 |
| Virtual Reality – Variable Rate Super Sampling | Adaptive |
Important explanation
Anisotropic Filtering: This setting can also be set to Application-controlled, but not every game has this option. What exactly Anisotropic Filtering is, you can read in this article, in which we have dealt intensively with the topic:

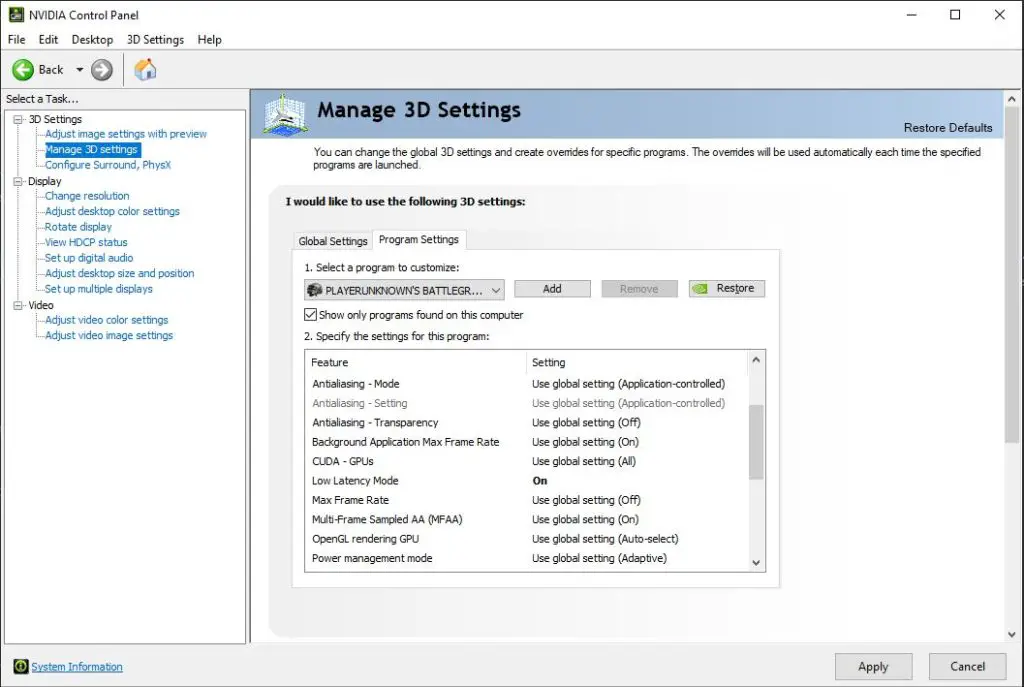
Low Latency Mode: If you play many games that offer NVIDIA Reflex as I do, then you can set this to Off because NVIDIA Reflex does the same thing but better. You can enable Latency Mode separately in the Program settings for games that don’t offer NVIDIA Reflex.
However, this can lead to stuttering and usually only helps your system when your graphics card is used at its maximum workload. So you have to test it a bit. We have a detailed article on this topic:
Max Frame Rate: If you want to limit your FPS, you should usually do it in the in-game settings since that’s when the input lag is the lowest. You can find out whether you should limit your FPS and what to consider in this article:

Power Management mode: Many recommend setting this to “Prefer maximum Performance.” It sounds excellent, with maximum performance, but it just causes your graphics card to run at full power all the time, generate more heat, consume more energy, and have a shorter lifespan. It will help if you let the graphics card rest when full performance is not needed.
Shader Cache Size: Unfortunately, NVIDIA doesn’t explain the default setting, so I recommend setting either 1 GB or 5 GB. You can also use more GB if you have a large hard drive. What precisely this setting is, you can read in this article:
Texture filtering – Quality: Here, you can set whether you want to trim ALL texture filtering options to performance or quality. You must select either Quality or Performance and not High Quality or High Performance because these settings can lead to problems like stuttering. We want performance above all else, so we set performance here, and all texture filtering options around it change automatically.
Honest recommendation:
You have the skill, but your mouse doesn't support your aiming perfectly? Never struggle with your mouse grip again. Masakari and most pros rely on the Logitech G Pro X Superlight. See for yourself with this honest review written by Masakari or check out the technical details on Amazon right now.

A gaming mouse that fits you makes a significant difference!
Display
Change resolution
| Refresh rate | 240Hz |

Important explanation
You should make sure that the refresh rate of your gaming monitor is set correctly for the resolution you use when gaming; otherwise, you might have a great monitor with 240 Hz, but it won’t be used at all, which would be a pity.
Adjust desktop color settings
| Digital Vibrance | 66% |

Important explanation
This setting is a matter of taste, although it can be said that a setting above 50% is usually better. But it also depends on your monitor settings.
Final Thoughts
I hope these settings will help you quickly find your best NVIDIA Control Settings because if you can use your system’s full potential this way, you’ll have a lot of fun with a game running smoother, and, more importantly, you’ll be able to show off your peak performance better.
Always remember that if you make changes in the NVIDIA Control Panel, you must restart the game for the changes to take effect.
If you have a general question about the post or pro gaming, write us: contact@raiseyourskillz.com.
Masakari – moep, moep and out!

Former pro gamer Andreas "Masakari" Mamerow has been an active gamer for over 35 years, more than 20 of them in the competitive scene (Esports). In CS 1.5/1.6, PUBG and Valorant, he has led and coached teams at the highest level.
Old dogs bite better...